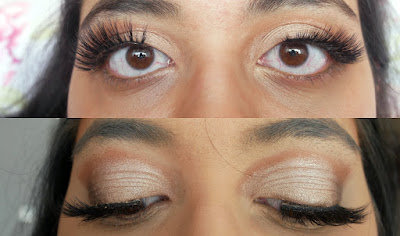
Whether it’s a special occasion, birthday or just a normal
night out, getting glam is my favourite thing to do. I love planning my makeup,
outfit, hair and going all out. The last year has been crazy and I haven’t been
able to do this as much until recently my ‘social calendar’ has started to fill
up and it’s been amazing to get the chance to get all dressed up.
On these occasions, I love applying false eyelashes to give
my look that final touch and it has fast become my favourite way to enhance my
eyes and complete the overall makeup look. Nowadays, there are so many
different options available, there is a style out there to suit all levels of
expertise. My personal favourites are the Ardell natural lashes, easy to wear and look beautiful. When it’s a special occasion, the Ardell nakedlashes are stunning.
Believe me when I tell you I understand the struggle of
applying lashes! I wear glasses all the time, so when it comes to applying lashes,
I have to go in blind and in the past, I’ve had my fair share of lash related
disasters. The band hasn’t glued on correctly,
they’ve not suited my eye shape, they’ve stuck down too well and then won’t
move – so many disasters. This is my guide to applying, wearing and removing
lashes without any hassle, fuss or stress!
Finding the right lash
This takes time, a lot of trial and error but it’s worth it. Don’t just buy a pair of lashes because they look pretty – buy them because you like the style, shape and they feel comfortable on the eye. I’ve tried and tested several brands, but always come back to Ardell. They have every style possible and something to suit every eye shape. If you haven’t found your perfect pair, have a look!
Applying
This is where it can all go perfect or terribly wrong. If
you are complete newbie or still on the hunt to find the one, try a pair of Ardell lashes and
follow these steps:
- First, carefully remove one
lash from the tray using tweezers or an applicator.
- Take the lash and measure against
your lash line/eye to ensure that it’s a perfect fit.
- Place them on your eye
without any glue to see how they look and if necessary, trim the lash from
the outside.
- Once you are happy with
the fit, take your glue and apply the thinnest layer to the lash band. Let
it dry for about 30 seconds – it needs to be tacky not dry.
- Take a small hand-held
mirror, place under your chin and look directly down.
- Use the tweezers or applicator,
to position the lash as close to your lash line as possible. Once you are
happy with the placing, attach.
- Move the lashes around and
adjust until they are sat perfectly and blended in with your natural
lashes.
Hopefully, after following these steps, you should have
applied a pair of lashes without any stress!
Removal
No matter the style of lash, removal is so important. Don’t
just rip them off as this can damage your natural lash and ruin the false ones
in the process. You can soften the adhesive with a cotton bud that is soaked in
a good quality eye makeup remove or an oil. Take the cotton bud and rub against
the lash line to peel the band off slowly. If you feel any pinching, then apply
more remover and try again. You can then
remove any glue that is remaining on the lash band, give them a clean and put
back in packaging to reuse.
Applying lashes is one of those things that sounds easier to
do than the reality! If you haven’t got the hang of it yet, I promise you will!
This post is an advertisement feature with Boots UK but all thoughts are my own


No comments
Post a Comment