A year ago I would have NEVER EVER worn anything more than a nude lip because I was petrified, and thought that it wouldn't look nice. Then I came to the realisation that I can wear any colour of lipstick I want, as long as I wear it right and don't go too bold too quickly. Here is your ultimate guide to wear bold lip colours!
Showing posts with label tips and tricks. Show all posts
How To; Wear a Bold Lip
Thursday, January 29
A year ago I would have NEVER EVER worn anything more than a nude lip because I was petrified, and thought that it wouldn't look nice. Then I came to the realisation that I can wear any colour of lipstick I want, as long as I wear it right and don't go too bold too quickly. Here is your ultimate guide to wear bold lip colours!
Tips and Tricks| Prom on a Budget
Thursday, January 22
It's only January I know, but if you have a prom/ball this year then you need to get thinking straight away about so many things! My year 11 prom was nearly 2 years ago, and thinking back now I am so glad I started to prepare in advance. Here are some tips and tricks to help you along the way and to have a prom on a budget!
Labels:
cheap,
fashion,
hair,
prom on a budget,
teen talk tuesday,
tips and tricks
The Ultimate Guide To Freshers Week
Wednesday, September 17
Top 11 tips for surviving Fresher’s week

Starting university can be one of the most daunting things to go through. Moving away from your friends and family can be a scary time.
But it needn’t be as frightening as people make out. There are plenty of ways to ensure your move into uni halls go smoothly. Follow these top tips for surviving Fresher’s Week:
1. Make your room homely – Moving into somewhere new can be a very daunting experience. That first night in your new room can be an odd and unsettling one, especially if you are moving straight from home and all its comforts. Create your own little space by making your room homely, like your room at home. Put up posters, make your bed, create nice lighting and decorate your space with trinkets and memorabilia.
2. Keep your door open when unpacking – While you are unpacking and sorting out your room keep your door open. This will encourage people to stop by your room and start conversation as you will appear more approachable.
3. Keep treats in your room – Everyone loves cake! If possible, have cake or chocolate or sweets in your room and give them out to your new house mates. This will get the conversation started and you will come across as a nice person to live with.
4. Play music – Have some music playing which you are setting up your room. Play it loud enough that your new flat mates will be able to hear it in the hall but not so loud as to annoy them. Hopefully this will get conversations started as people will come in and ask about your music taste. Before you know it you will be discussing Biffy Clyro, Rihanna and Avicii!
5. Buddy up – Once you have met your flatmates, buddy up! It can be scary having to go and talk to new people without a friend by your side to back you up, so gather your flat mates and go chat to people. Suggest a house outing to a fresher event to try and get the conversation flowing.
6. Save a taxi number to your phone – Moving to a new city or area of the country means you don’t know your way around and probably know even less when under the influence of alcohol! Make sure you google a local taxi number and save it to your phone, but to be even more sensible, find a local taxi number from the Student Union as these will be recommended companies. At least if you get lost you can call a cab to come and save you from a 10 mile walk home!
7. Check fresher week schedules – With so much going on during Fresher’s week, it can be hard to keep up. Sign up to email notifications of events going on your campus and suggest events to your flat mates. Even if they aren’t keen to go, go along by yourself and chat to people – it’s the only way to make friends!
8. Condoms – Sometimes a drunken night can lead to a little too much fun… ensure you are prepared by carrying a condom or two. Not only do these prevent pregnancy (obviously!) but also the passing on of sexually transmitted diseases and vaginal infections such as BV.
9. Try to go to as many social events as possible – Try to attend as many events during Fresher’s week as you can. It may be tiring but it will mean that you are open to making friends and getting to know your campus and university.
10. Take your vitamins – With so many social events to attend, it is important to keep your energy levels up and your immune system strong. Taking multi-vitamins and supplements from Nutrition Centre will help keep your immune system strong. Try taking Nature’s Own Vitamin C Extra to help avoid the dreaded ‘Fresher’s Flu’.
11. Always take cash out with you when you go out – You don’t want to be the one everyone has to loan money to because you haven’t got cash on you. Make sure you carry enough cash on you to have a couple of drinks and be able to get home.
Find out more about getting the right vitamins for you on the Nutrition Centre! Also why not buy yourself a face mask from Montagne Jeunesse whilst you relax before you go out!
*Post Courtney of Wired Media*
Operation Fix My Skin.
Tuesday, July 1
Over the past few months I seem to have my skin under control, with a few occasional breakouts here and there. Then I go through stages when my skin is really bad it really needs a good detox, so I have set my self a challenge to get my skin sorted through the month of July and then hopefully by the time we get to August we will be fresh skin and ready.
- The first thing I need to do is stop using all these different products and treatments, instead use certain ones because my skin needs stop having all these things slapped on to it.
- For those who didn't know my skin is very sensitive, therefore I have to be so careful about the products I use because anything could happen, of course at first you are going to get small breakouts but it will be fine in the end.
- I also need to start drinking lots and lots more water, this includes cutting out the fizzy drinks that I consume every now and then. I guess one is ok but I seem to need it all the time.
- As well as cutting out the high volume of fizzy drinks, I also need to cut the coffee. I seem to be addicted to it and can't stop drinking so it needs to stop.
So that's what I need to do, but what will I be doing instead?
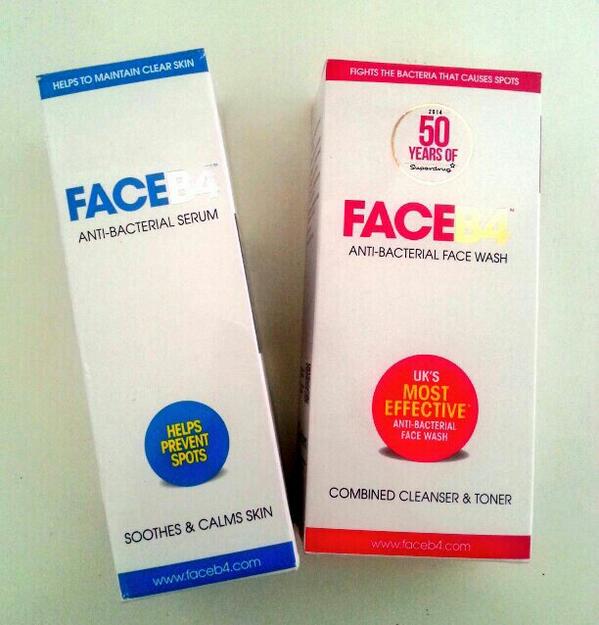
- I swear that I will stick to a skincare routine and these are the products I will be using from Face B4. Who asked If I would like to review some products and take their skincare challenge, sticking to using only one brand and these products night and day will hopefully help my skin.
I will be sending FaceB4 weekly skin updates so they know what a difference their products are making as well as writing a blog post at the end of July to show you all what a change I can see in my skin. Hopefully it will be noticeable and seen.
What is your skincare goal?
A Lazy Girl's Guide to Summer Beauty!
Tuesday, June 24
Recently I got the chance to guest post over on Taylor's blog, and would just like to say thanks to her for the chance. This is 'A Lazy Girl's Guide to Summer Beauty'! I thought of putting the post on here as well as I love it that much.
Today I am going to take you through some easy steps to get you ready for the summer, and if you're anything like me - then you will agree that the summer brings out the laziness inside of you. No one wants to spend hours doing their hair and makeup, right? Summer is meant to be easy, carefree and fun! So here are a few cheats which will mean spending less time in front of the mirror. Shh!
1. BB Cream - No one has the patience to throw on a sunscreen then a foundation ect. Instead going with a BB Cream is the easier way out because you are combining everything in one. Garnier and a lot of other brands have started making ones with SPF included which keeps you protected from the sun.
2. Face Wipes - It's a big no no in the beauty world to use face wipes, but if you don't have a lot on your face everyday I don't see the problem with using good quality ones like these Simple ones.
3. Dry Shampoo - If you're wanting to make your hair last all day or can't be bothered to wash it, then dry shampoo will be your best friend. Why? This will absorb all the oil in your hair and make it look fresh and brand new.
4. Spray on Moisturiser - Moisturiser is like Marmite. You either love to cover your skin with lots of cream or you complain of sticky, non-absorbent formulas. Thanks to Vaseline this spray on moisturiser will absorb straight into your skin! One quick spray and you're ready to go.
5. Waterproof Mascara - This stuff is amazing in the hot weather because the waterproof formula stays on your eyelashes for ages, even though its a pain to get off.
6. Nail Wraps - If you are a big fan of nail art but are far too lazy to sit there and paint them all, then nail wraps are the greatest inventions! Long lasting and won't take you all day.
7. Texture Spray - Along with dry shampoo I love to use texturing spray to add some extra boost to your hair and it will help with those beachy waves.
Washing Makeup Brushes With Micellar Water?!
Tuesday, May 20
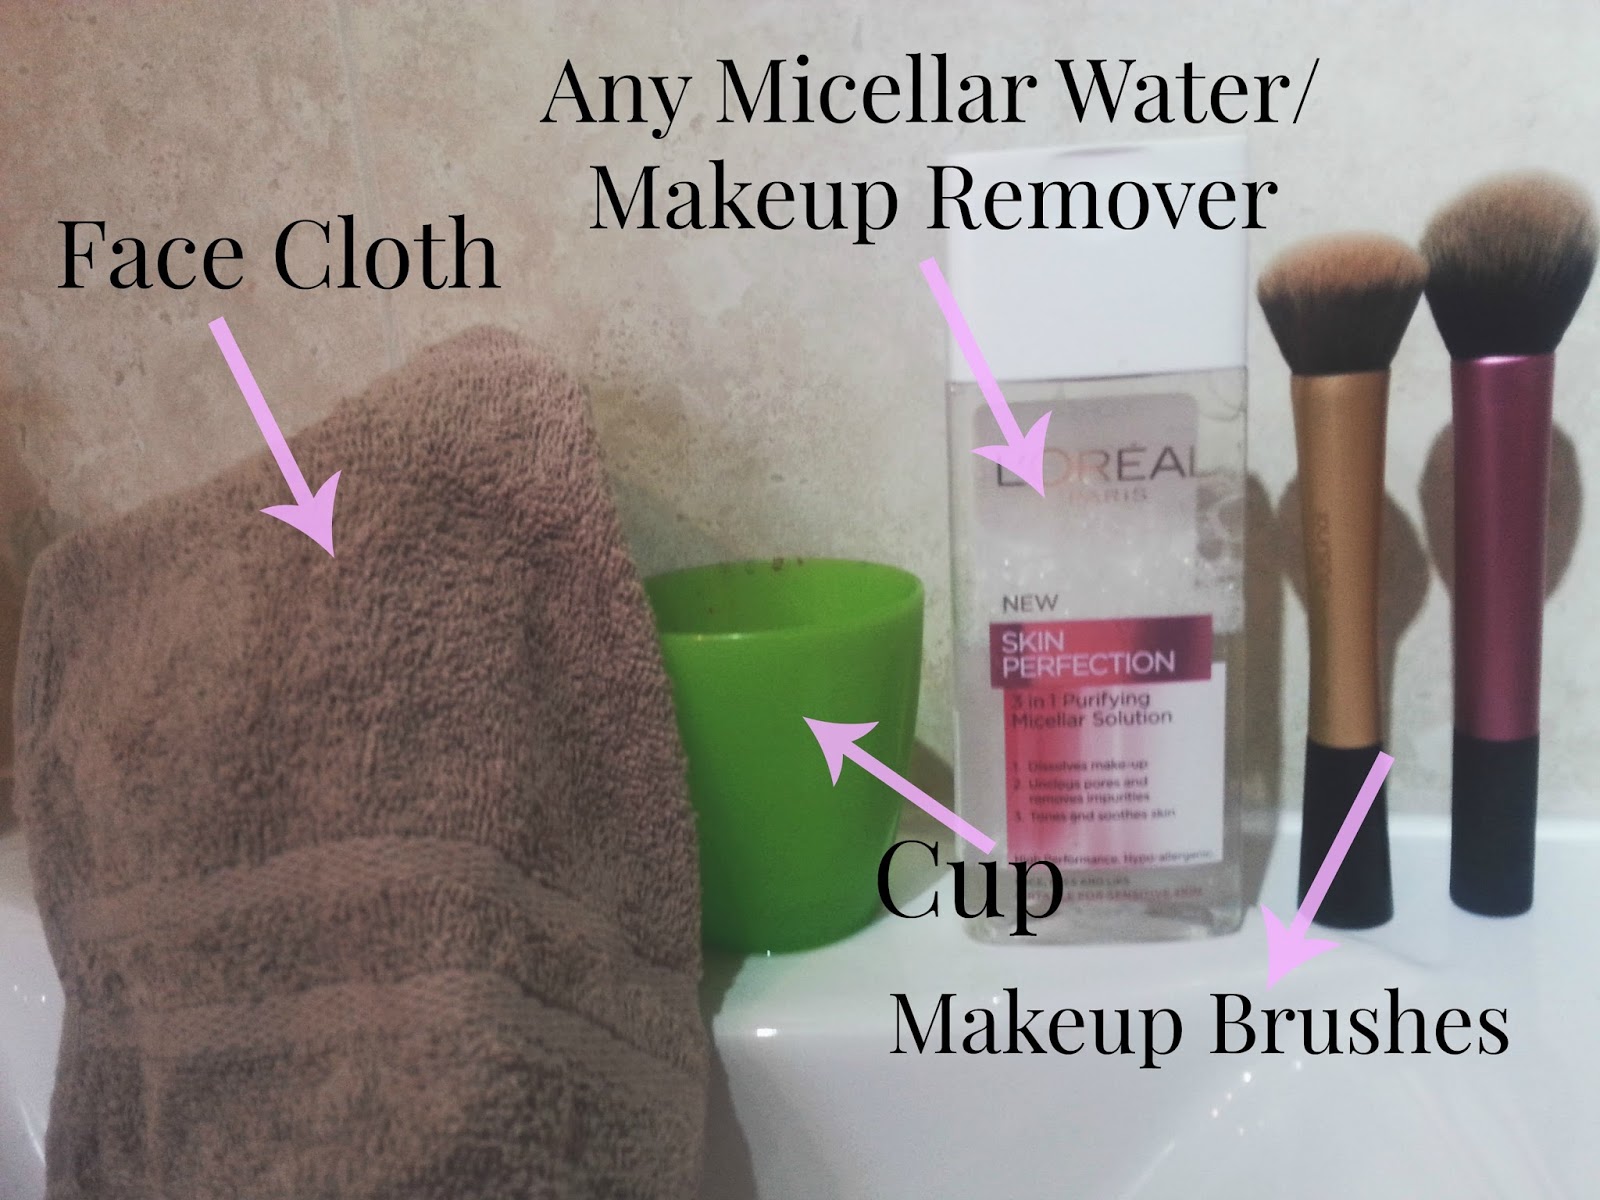
Yes, you did the read the title right. Forget all this shampoo and using a fancy makeup cleaner, I discovered a few weeks ago that using micellar water will clean your brushes to make them look as good as new. I actually am trying to finish up this L'oreal one so its the perfect way to use it up even quicker. Here's what you need, and then I will run you through the super easy process.
1. So once you have everything together, you want to pour some of the micellar water into a cup or a dish and you may need a little amount and sometimes a lot, it really depends on how many brushes you have and how much product is on them. I found I used loads for my buffing brush and hardly any for eye brushes.
2. Then you want to take your messy brushes and dip and swirl them around until your brush is covered in the micellar water, I gave them a good swirl around and made sure the entire bottom was covered.
3. Then the final step is to take your face cloth/towel or even tissue if you want and to just drain the water out so there isn't anything left. If there is any makeup still coming out then go back in to your cup and give it another swirl.And then you should be good to go, after washing you will see that your brushes are clean and it took hardly any time!
How super simple was that?! Why didn't I know that before!!
Let me know if you guys try this, I would love to know your thoughts!

Tips for Balancing School Life+Blogging!
Tuesday, May 13
You're currently reading this post as I sit one of my AS Level Exams! As a full time student that has gone through her GCSE's and now doing her A-Levels I can tell you that it is easy to manage your school/work life with your blogging life. It sounds hard and complicated but trust me, you can do it and here are a few of my tips and tricks.
ORGANISATION+PLANNING
It sounds so obvious, but yet so many people forget. You need to be on top of your game to manage a blog and your school work. Take time to think about blog posts that you want to make, I tend to get ideas in lessons and quickly write them down on my hand to go home and write down correctly - this way you won't get 'writers block'. If you know when things need to be handed in at school, make sure you get posts written before the deadline so that you can focus on the work at school rather than sit writing a blog post.
BULK PHOTOGRAPHING+WRITING
I tend to spend a Saturday at the end/start of the month taking lots of photos of products ect that I know I want to get up soon. I like to do this because my mind is a at rest. Save them in a folder on your computer so you know you have them. This means you have photo's ready to use when you decide to write a post, and you can still take photos whenever you want - its just easier to have some stored. Weekends are the best time to blog in my opinion, with homework that might need to be in the next day you find it difficult to write and study at the same time. Take a Saturday morning to spend a few hours writing up posts and scheduling them to upload whenever you want them to. Makes life easier, that's what I do - for example I am writing this post in April and you're seeing it in May!
DON'T FEEL PRESSURED
If you can't get a post up then don't worry, you aren't hurting anyone by not posting on a certain week or day. Take a break and post when you feel ready and take your time writing; the last thing you want is to be writing a post when you are super stressed or worried. It doesn't matter if your blog is as perfect as someone else's or you don't have a review about a product that another blog has, as long as you are enjoying blogging and doing what you're doing then leave it be. Your blog shines in its own way.
Only a few tips and tricks can help you a lot, and I still find it hard to manage both but find your own way. Let me know your ways!
Why Dry Shampoo is your Best Friend!
Thursday, April 3
Over the last few weeks,I have become very reliant on the wonderful bottle of dry shampoo that is in my draw! Why? Well because it makes me life easier and so much less hassle! Let's run through why dry shampoo is already my best friend and will be yours soon!
What is Dry Shampoo?
Is a powder that is used to clean hair without having to wash it and it getting wet. The ingredients that it is made with soak up the oil and dirt on the scalp, leaving your hair looking refreshed and good as washed hair. Dry shampoo can be used on all types of hair. It comes in various forms to choose, and different smells, and types depending on your hair!
Why is it so good? Well..
- Saves Time!
If you are in a rush, and don't seem to have enough time to wash your hair and then set it properly then you just have to spray some into your hair and rub it in. Instead of having to wash your hair 4 times a week, you can only wash it twice by substituting washing for dry shampooing!
- Less Heat
When you wash your hair, you have to then dry it and then either curl or straighten it. Using dry shampoo means that you won't have to have as much heat applied to your hair and makes your hair healthier in the long run.
- Volume
If you hair is feeling flat and lifeless, then you can use a spray of dry shampoo to give it that extra oomph and blast of volume! By using it the night before, you will get added volume,
- Portable
You don't have to carry all your tools around with you when you're away if you have this bottle of saviour with you, it comes in travel sizes so you can pop it in your overnight bag or handbag and use when needed.
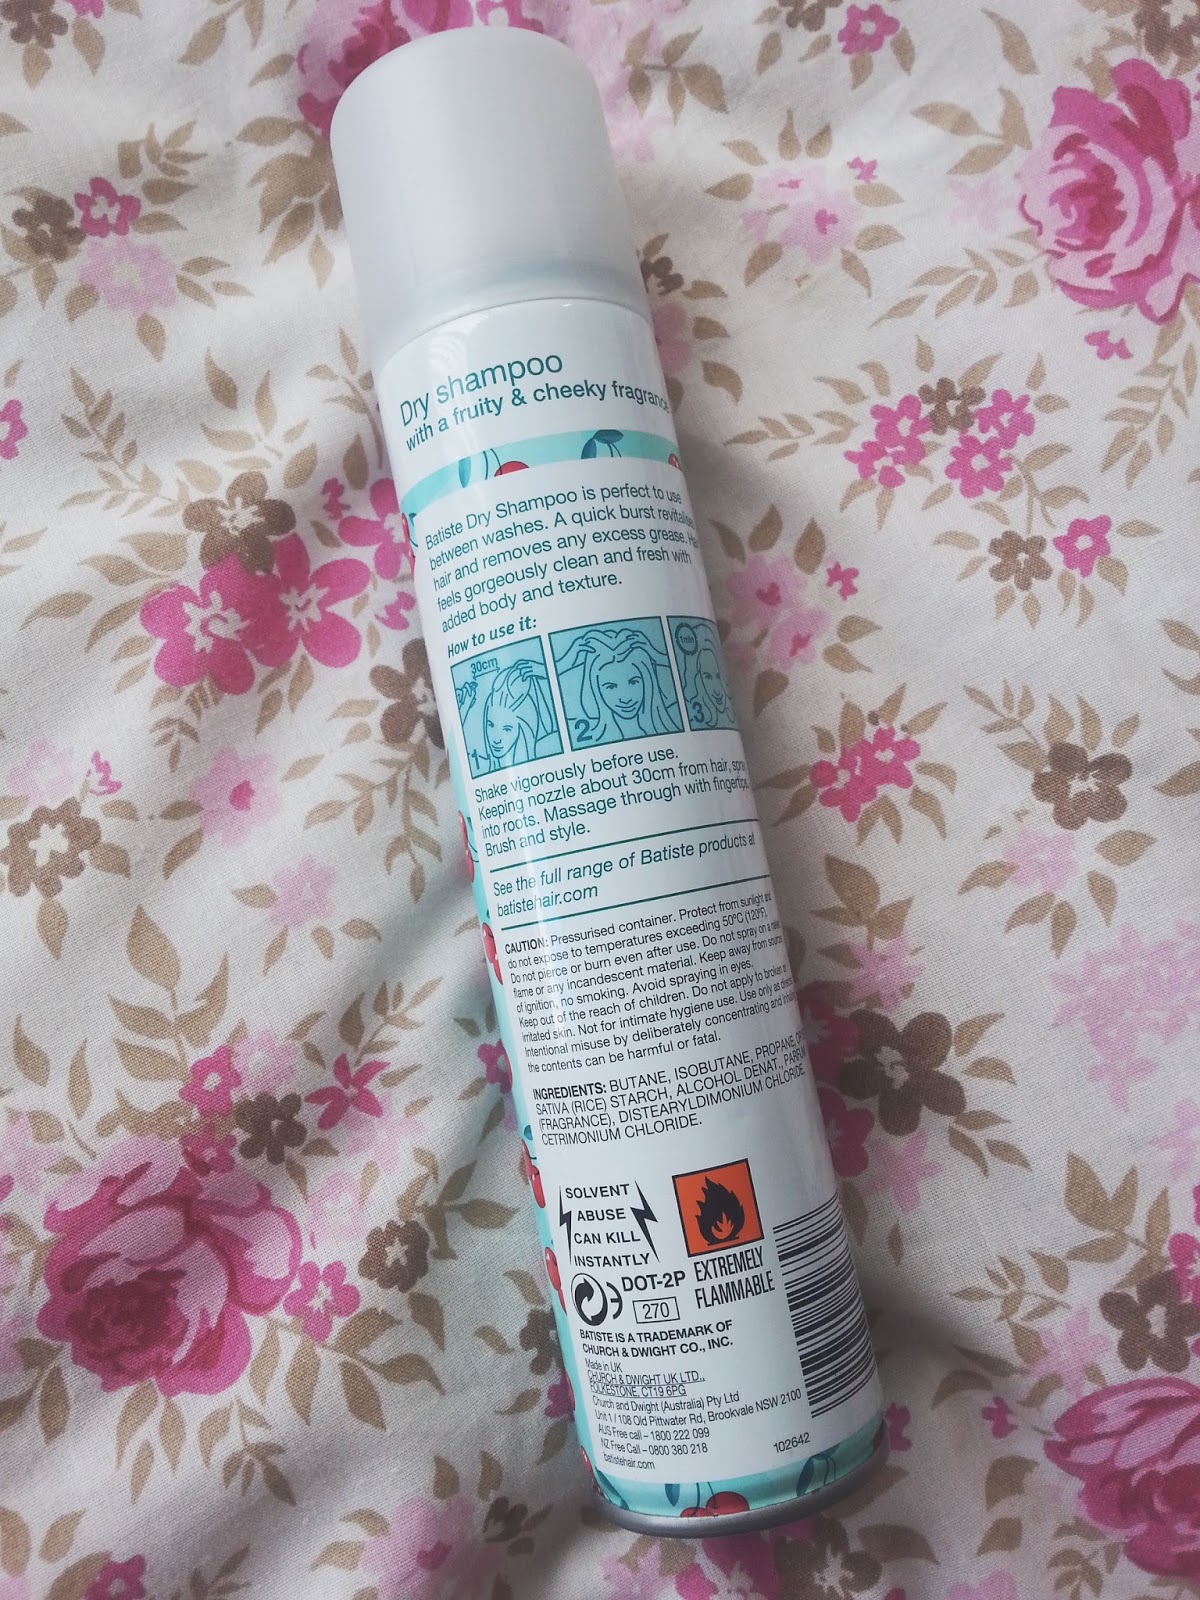
There are so many dry shampoo's out there, many that may work for others and not you! My favourite brand is by far Batiste and the one pictured at the top, is my current scent!

Labels:
batiste,
dry shampoo,
hair,
teen talk tuesday,
tips and tricks
Green Tea - My Skin Saviour
Saturday, March 1
It's not a Tuesday I know, but I want to do a teen talk Tuesday style post all about my best friend Green Tea! A few weeks back I started a challenge to drink a cup of green tea everyday or even every other day if i can, to see what a difference it makes to me health wise and other benefits as well - and boy oh boy it has made such a big impact on my life. You won't see benefits straight away as it does take time!
 Why Green Tea?
Green tea has been used as a medicine for thousands of years, originating in China but widely used throughout Asia this beverage has a multitude of uses from lowering blood pressure to preventing cancer. The reason that green tea has more health benefits attached to it than black tea is (apparently) due to the processing. Black tea is processed in a way that allows for fermentation whereas green tea’s processing avoids the fermentation process. As a result, green tea retains maximum amount of antioxidants and poly-phenols the substances that give green tea its many benefits.

Green tea has been used as a medicine for thousands of years, originating in China but widely used throughout Asia this beverage has a multitude of uses from lowering blood pressure to preventing cancer. The reason that green tea has more health benefits attached to it than black tea is (apparently) due to the processing. Black tea is processed in a way that allows for fermentation whereas green tea’s processing avoids the fermentation process. As a result, green tea retains maximum amount of antioxidants and poly-phenols the substances that give green tea its many benefits.
How has it benefited me?
Well, I have seen a huge difference in my skin! I have a problem with breakouts and have found very few treatments that work for a long period of time, but since starting to drink green tea my over all skin complexion and the breakout frequency has improved so much. My main spots always used to come out on my forehead and they have dramatically decreased, there are still scars there but its good enough for me! I have also been sleeping a lot better (And a lot early in fact!) after a few hours of drinking the tea I feel tired and ready to close my eyes and sleep like a baby!
There are so many other benefits to green tea such as helping with weight loss, and more that you can read here!
Labels:
beauty,
benefits,
green tea,
healthy,
help,
skin,
teentalktuesday,
tips and tricks
Starting Off; Makeup Tools ♥
Tuesday, October 29
No way is this the last ever week of #TheSoProject!! I can't honestly believe that 10 weeks have gone so quickly, and that since first signing up to do this project my knowledge has grown so much more! For the final ever time, I will be taking to you about how to apply your make up.. there are so many different ways to apply it that you are spoilt for choice on what to pick and when and how!
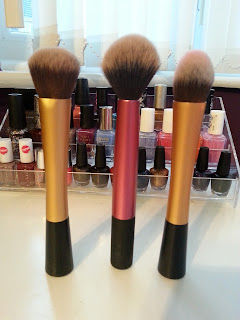
First of all is the most common one which is brushes! There are so many brands out there that you could choose from and use, but my favourite has to be Real Techniques because there is something for everyone for such a great price. It would be something I would add to your wish list because they are amazing! In the below picture you can see two gold brushes, these aren't actually RT they are 'dupes' I bought this on Ebay for £3 each or you can but the whole set for £12. Just like the real ones they work perfectly! The on the left is mainly for foundation and is great for all different types! It also helps create a flawless finish on your face.. the one on the right which is pointed can be used for either blush or bronzer as it is tapered.
The one in the pink is from the actual RT travel collection and is the multi-task brush, you are able to use this one for everything - foundation, powder, bronzer and blusher. Just like the dupe ones it works perfectly on your face and picks up just the right amount of product!
To read a full review and where to buy the gold ones check it out here.
Find out about the pink one and where you can buy them for slightly less money click here.
The next thing you could use is make-up sponges that are now available to buy anywhere! These are great used damp with foundation and again give you that flawless airbrushed look to your whole look. For such a great price you can achieve such a lovely look and they come in all different shapes and sizes so you are able to find the one that is the best for you to use.
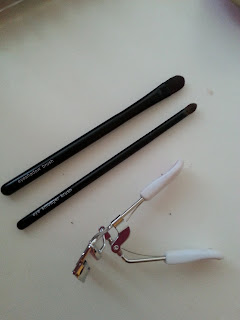
As well as using brushes and sponges for your face you need tools for your eyes to make them look amazing as well. The two black brushes in this picture are from a make up brush set I actually bought it in a set for Morrisons and haven't stopped using them since! The one at the top is a eye shadow brush which is flat so it makes it easier to really pack on that eye shadow and really bring out the vibrant colours that you want to show off. The other is a eye smudge brush that I love using to mix together colours on the eye and use it more on the crease line so that there aren't any harsh lines that make it look a little like a dolls make up. One of the best tools ever invented has to be the eye lash curler, this one from Primark is my favourite. Why? Well, it was not only cheap but also great at curling your eyelashes before you apply that lovely mascara to give you even longer looking lashes!
TIP - heat your curler for a little while with a hair dryer to make it easier to curl them lashes!
Thank you for being with me for the past 10 weeks and I hope that you have all enjoyed these posts, and if you want to go back and read the rest then click here to find them all together!

Labels:
dupes,
makeup,
makeup sponge,
real,
real techniques,
TheSoProject,
tips and tricks,
tips for teens,
tools
Starting Off; Foundation ♥
Tuesday, September 10
Today we will be chatting about foundation. The do's the don't and my personal favourites, thesoproject is about helping you and the basics always come from the teachings and the help guides. No clue what I am on about then check out this post here to find out more.
---
Picking a foundation can be so confusing what Colour? what formula?Now if you know your skin type that's a start! If you need to know what tone your skin is then check out my previous post here. No matter your age or even experience foundation is the hardest make up step of its all. (please note that these are my views, I am no way a professional and my best advice would also to go see a professional.
Full or Opaque Coverage- this is going to completely cover your skin it is the most pigmented foundation, these foundations cover heavy scarring, discolourations,are used in dramatic make up, or just the Appearance of Flawless Skin!
Matte- Makes your skin feel like it has powder on.
Luminous- Gives you a shiny glow.
Natural- Your skin basically appears how it is without foundation, but with it on.
Liquid Foundation- The most common one that people use because , it blends easily, and comes in a variety of coverages.
Powder Foundation- This gives you more coverage when you build the amount up.

---
Picking a foundation can be so confusing what Colour? what formula?Now if you know your skin type that's a start! If you need to know what tone your skin is then check out my previous post here. No matter your age or even experience foundation is the hardest make up step of its all. (please note that these are my views, I am no way a professional and my best advice would also to go see a professional.
Coverage - If you know your skin type then the next step is the type of foundation coverage you want and would prefer.
Sheer Coverage- a little bit of coverage almost transparent, you will be enhancing your skin with this formula of foundation and even out your skin.
Medium Coverage- this foundation will cover most of your minor imperfections on its own, this is the most common for everyday wear.
Medium to Full Coverage- Build able coverage which means that you can apply your foundation in a medium coverage and go back and cover problem areas again making it full coverage in those areas, natural yet covered.
Full or Opaque Coverage- this is going to completely cover your skin it is the most pigmented foundation, these foundations cover heavy scarring, discolourations,are used in dramatic make up, or just the Appearance of Flawless Skin!
Finish - This is to describe how your foundation will look when it is set and applied.
Satin- Doesn't shine yet has a slight shimmer to it.
Matte- Makes your skin feel like it has powder on.
Luminous- Gives you a shiny glow.
Natural- Your skin basically appears how it is without foundation, but with it on.
Types - There a so many types of foundations that are available for you these days, it is always best to test them all before picking one you prefer.
Powder Foundation- This gives you more coverage when you build the amount up.
Creamy Foundation- Comes in different ranges of coverage and is blend-able on all skin types.
I also have three favourites, all of different coverages and types.
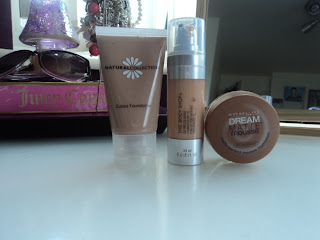
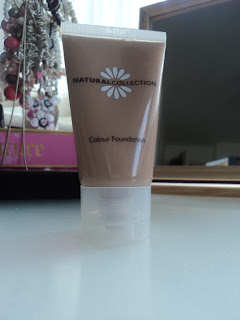
- Natural Collection Foundation - This is my everyday favourite it gives me a medium amount of coverage that isn't too heavy for the day. It covers what it needs to as well as evening out my skin tone at the same time. It is also very affordable and great for sensitive skin like mine.
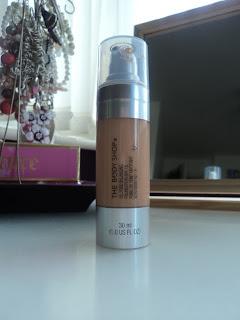
- The Body Shop Oil Control Foundation - Do not be scared by the name, I have dry skin and this foundation works on me as well. This is more of a high coverage foundation and is perfect for an evening out or when you need that little bit more of your face covered and it hides all imperfections.
- Maybelline Dream Matte Mousse - A mousse foundation is great for light coverage and high because the amount you use can be adjusted to what look you are trying to achieve. A lot like powder you are able to build and blend as you go along to great a flawless finish to your face and make it look dewy.
The way you apply foundation has to be down to your preference, there are so many ways these days as to what you can use, but the finish I find is always the same.
- Sponges/ Beauty Blender - Make up sponges are the cheapest tool you can buy to blend in your foundation this and a beauty blender takes time, but you can defiantly get your foundation to be blended in nicely.
- Brushes - Whether it be foundation brushes, stippling brushes or even an expert face brush these are the most common tool to use because it speeds up time and really helps to blend in all that product to even everything out.
-Hands - Yes, this might sound disgusting but trust me if you are ever in a hurry and need to quickly apply foundation then this is your best bet. Not only is this easy and free, you will be able to make sure that the look of your face is what it is meant to look like.
If you want to see my favourite tools then you will have to check back soon!
Concealer Post
Skincare Post

Guest Blog Post// Sophia & Ainsley's Top Summer Trends ♥
Monday, August 12
Prepare to spend some money!! For the second round of my guest blog posts, bring you the lovely
girls from Blogging Beauty Buddies. Sophia and Ainsely's are two lovely girls and
we have spoken for ages now! We have a few things coming up together now so
keep your eyes peeled! They are going to talk to you about
their favourite summer trends!
---------------------------------------------
Hello Class and Glitter readers! We are the blogging beauty buddies, Ainsley and Sophia. We have a blog as well (duh) and post content on a weekly basis. We really like posting on our specified days for a more structured blog. We have Makeup Monday, TAG Th----ursday and Fun Friday where we write a variety of makeup, fashion and lifestyle posts. We have known Parie (through the wonders if the Internet) for a couple months now and we were so excited for the chance to guest blog. Alright, let's get right into our Summer Trends post!
Sophia's Favourite Summer Trends:
1. Coloured Hair! This is something really fun that we have been seeing all the time. Using hair chalking techniques or dye (rinse out or permanent) this is something really fun that basically anyone could try!
I love the colours in her hair!
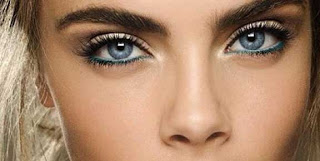
2. The other summer trend I have been loving is coloured eyeliner! I just think that it is so fun for summer and it just adds something interesting to your look, and we will be posting a tutorial on this soon!
I really love the way this looks on Cara Delevingne!
Ainsley's Favourite Summer Trends:
3. One of my favourite summer trends has to be super cute hair accessories. I really think that they are a super fun way to add colour to your hair without any commitment. Hair bows are really cute with buns, with the half up half up do, and also a pretty way to keep your bangs out of your face! I also really love floral headbands, they are perfect for more of a bohemian vibe, definitely perfect for a music festival or just hanging out during the summer.
4. My other favourite trend for summer is anything floral printed! With so many different options, your sure to find your perfect floral printed piece!
Try out the floral print trend by wearing a cute dress like this one from Forever 21
We would like to take an oppertunity to thank the lovely Parie for letting us guest blog for her, it was really fun! Thanks for reading, and please check out our blog! have a great day!
xoxo BBB
Also be sure to check us out on all our social media! (more are linked on our blog!)
Instagram @bloggingbeautybuddies
Polyvore: bloggingbeautybuddies

Subscribe to:
Posts (Atom)


